When your Android device connect to a WiFi network, it gets ip address, gateway and couple of DNS server addresses from the DHCP server. It is the default action. If you want, you can alter all those internet address and add your won. Here this article guides you to change DNS address of a WiFi connection and use your own.
Through this method you cannot change the cellular network’s DNS servers (2G, 3G, 4G LTE, etc).
Change DNS in android devices without rooting it
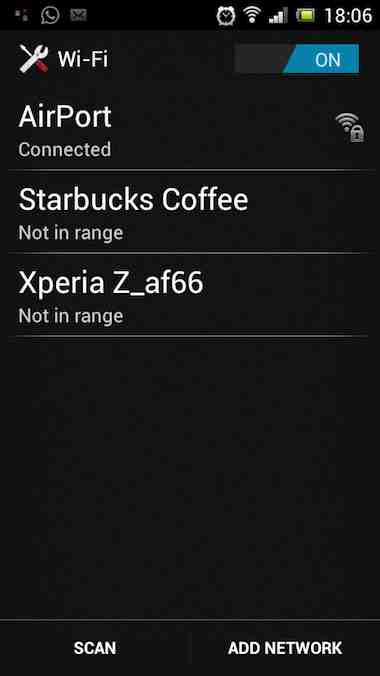
First go to “Settings” and open “Wi-Fi”. Now you can see all the WiFi networks you connected now and earlier.
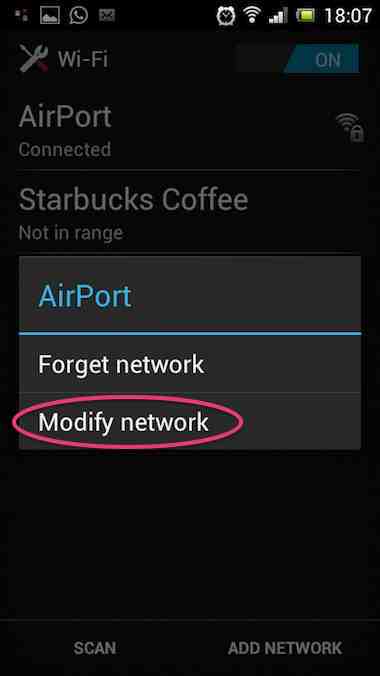
Press and hold on the network you need to use custom DNS servers (or the currently connected one) and select “Modify network”.
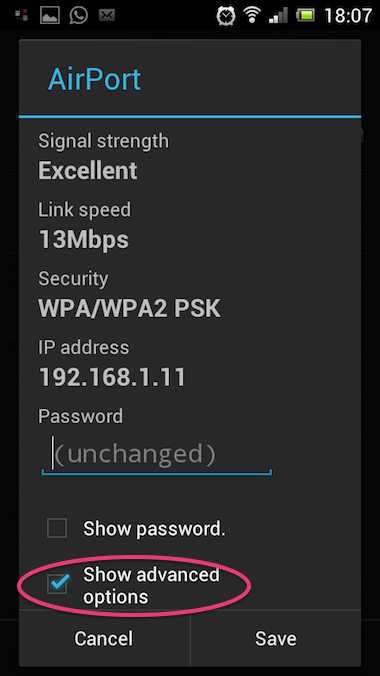
Scroll to bottom and tick the “Show advanced options” checkbox.
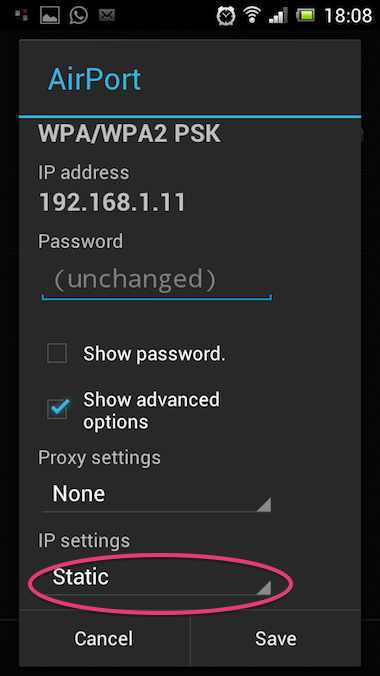
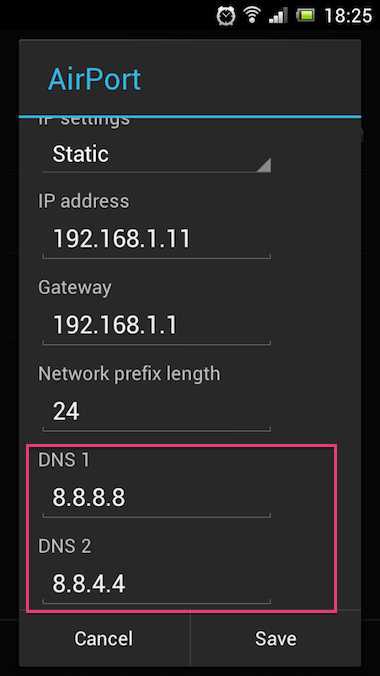
Under the IP settings change DHCP to Static . Again scroll to bottom and use custom DNS server addresses in DNS1 and DNS2 sections.
Note: When you connect to another WiFi network, you need to repeat these steps with that network also.
Use Google’s public DNS/OpenDNS on Android
Google’s public DNS servers: 8.8.8.8 and 8.8.4.4
OpenDNS servers: 208.67.222.222 and 208.67.220.220
Could you confirm that those options are not available under Lollipop?